

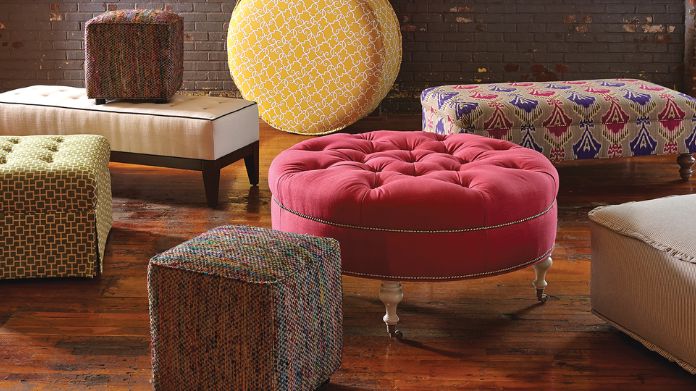
Ottomans aren’t just a place to rest your feet; they can also be stylish storage solutions. In this guide, we’ll show you how to build DIY Ottomans with storage from scratch.
Whether you’re a newbie or have some experience, these steps will help you create a functional and fashionable piece.
With simple materials and tools, you can design an ottoman that matches your space and meets your needs. Get ready to transform your living area with your very own handcrafted ottoman.
Let’s dive into the world of DIY Ottomans and add a personal touch to your home.
Table of Contents
Materials and Tools Needed to Build DIY Ottomans
Materials:
- Plywood: This will form the base and sides of your ottoman. Choose a thickness that supports weight and is easy to work with, typically around ¾ inch.
- Foam Padding: This adds comfort to your ottoman. Select a thickness that suits your comfort level, usually between 1 to 2 inches.
- Fabric: Pick a fabric that matches your decor and can handle wear and tear. Consider upholstery fabric for durability and style.
- Wood Screws: These will hold your plywood pieces together. Lengths may vary based on your plywood thickness.
- Hinges (Optional): If you want a storage ottoman with a hinged lid, you’ll need a piano hinge or similar.
- Legs (Optional): Adding legs elevates your ottoman and can enhance its design. Choose a style and height that fits your space.
- Staples and Staple Gun: These will secure your fabric and foam to the plywood.
- Wood Glue: This reinforces the bonds between your plywood pieces for extra sturdiness.
Tools:
- Saw: A circular saw or hand saw is needed to cut your plywood to size.
- Drill: You’ll use this to assemble the plywood pieces with screws.
- Measuring Tape: Essential for accurate measurements of wood, foam, and fabric.
- Scissors or Fabric Cutter: Needed to cut your fabric and foam to the correct sizes.
- Screwdriver: Useful for tightening screws and assembling any additional hardware.
- Pencil or Marker: For marking measurements on your plywood and fabric.
By gathering these materials and tools, you’re well on your way to creating a functional and stylish DIY ottoman that adds extra storage and charm to your space.
Remember, the quality of your materials can greatly affect the outcome, so choose wisely and ensure you have everything you need before starting your project.
Step-by-Step Instructions to Build DIY Ottomans
Certainly! Here’s a detailed explanation of each step involved in building a DIY Ottoman with storage:
1. Preparing the Base
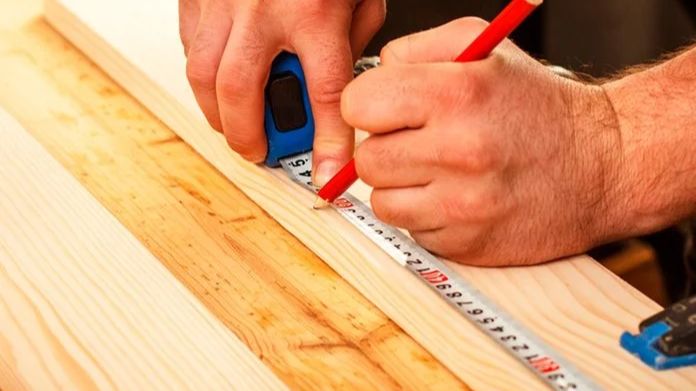 Let’s start with the foundation of your DIY ottoman. Grab your plywood and measure out the dimensions you’ve decided on for your ottoman.
Accuracy is key, so double-check those measurements. Now, it’s time to cut. Using your circular saw or hand saw, follow your lines to cut out the base and the sides.
Remember, the quality of your base determines the stability of your ottoman, so aim for precision in your cuts. This base will dictate the overall size and shape, setting the stage for your creation.
2. Assembling the Frame
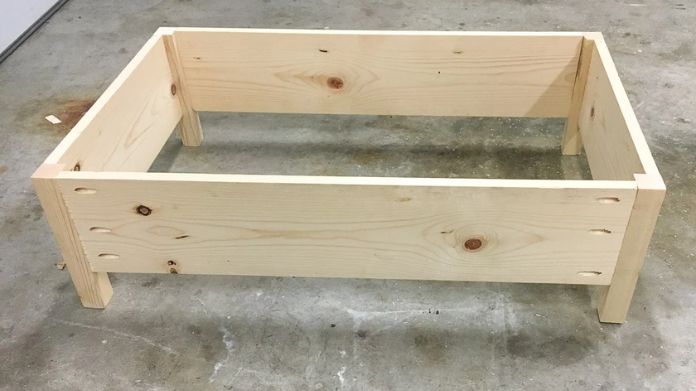 With your pieces cut, it’s time to build the frame. Think of this as constructing a simple box. You’ll need your drill and wood screws for this part.
Attach each side piece to the base, ensuring that every angle is a perfect 90 degrees – a right angle ensures a balanced and sturdy frame.
If you want to reinforce the structure, apply wood glue along the edges before you screw them together. This frame is the skeleton of your ottoman, so make sure it’s solid and well-crafted.
3. Adding the Storage Component
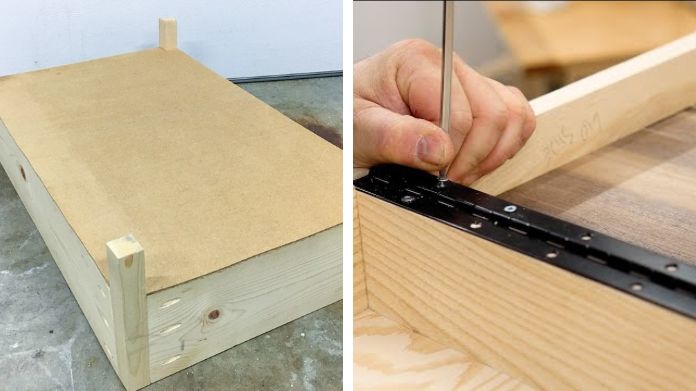 Now, let’s turn this box into a storage haven. If you’re opting for a hinged lid, attach your piano hinge to the back edge of the lid and then to the corresponding back edge of the frame.
Test the motion to ensure the lid opens smoothly and stays securely when closed. For a removable lid, just ensure it fits neatly on top of your frame. This step transforms your ottoman from a mere seat to a versatile storage solution.
4. Upholstering Your Ottoman
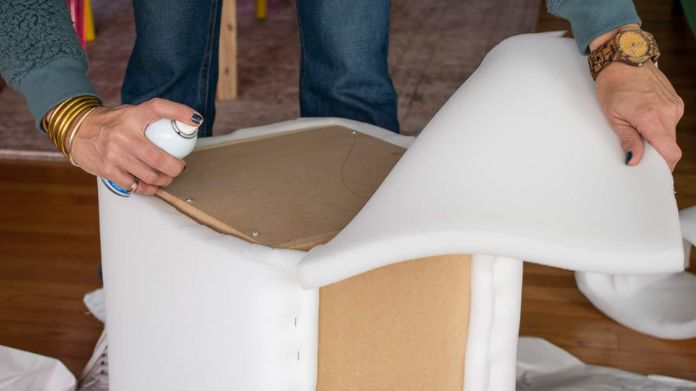 This is where your ottoman starts to come to life. First, cut your foam to match the size of your plywood pieces. Attach the foam to the base and sides using spray adhesive.
Then, choose your fabric – something that complements your room and can handle regular use. Drape the fabric over the foam, stretching it tightly around the frame, and secure it with your staple gun.
Work slowly to avoid wrinkles and ensure the fabric is taut and even. This upholstery process not only adds colour and texture but also comfort to your ottoman.
5. Customizing Your DIY Ottoman
 Here’s where your personal style shines through. Add unique elements to make the ottoman truly yours.
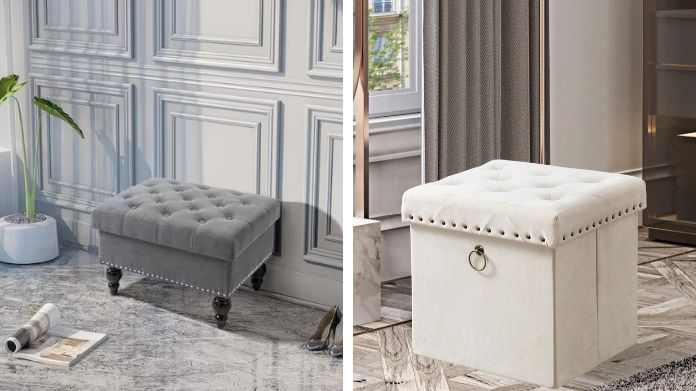
This could be elegant tufting on the lid, stylish nailhead trim along the edges, or even distinctive legs to elevate the piece off the floor.
These custom touches can transform your ottoman from a simple piece of furniture to a standout feature in your room.
6. Final Touches and Maintenance
 You’re almost there! Add any final embellishments to polish off your project. Once complete, maintaining your ottoman is key to its longevity.
Regularly vacuum the fabric to remove dust and treat any stains as soon as they occur. Check the structure occasionally to tighten any loose screws and ensure the lid continues to function properly.
With proper care, your DIY ottoman will remain a beautiful and practical addition to your home for years to come.
Summing Up!
Building DIY Ottomans with storage is not only a rewarding DIY project but also an excellent way to add functional, stylish furniture to your home.
Follow these steps, and you’ll have a unique piece that meets your storage needs and reflects your personal style.
This is such a creative and inspiring DIY project! I love how you’ve broken down the steps for building ottomans in a simple and beginner-friendly way. The detailed instructions and material suggestions make it feel achievable even for someone new to DIY. Can’t wait to try making one myself perfect for adding a personal touch to home decor. Thanks for sharing!