

Do you prepare to breeze through the summer with a cool, effective window fan? Keeping this equipment clean is essential to ensure it performs properly.
Cleaning the fan regularly enhances its efficiency and contributes to a healthier interior atmosphere.
Dust, pollen, and allergens can accumulate over time and negatively impact your health.
So, why take risks? This article’ll show easy and efficient ways to clean your window fan and keep it functioning correctly.
Let’s start on the path to a cleaner, more relaxed, and happier home with okayreview!!
Table of Contents
Why Cleaning Window Fans is Important?
Cleaning your window fan regularly is essential for its performance and lifetime. Neglecting this item might decrease indoor air quality, which can induce asthma and allergies.
Dust and allergies can also be a fire danger, and blocked fans can overheat. Cleaning has various advantages, including increased efficiency, preventing health concerns, and extending the fan’s lifespan.
Clean fans offer better air quality, better cooling performance, and lower energy consumption.
Maintenance regularly provides appropriate ventilation, excellent fan functioning, and long-term cost savings. Also, maintain your other home appliances like AC, fan, cloth steamer, and iron.
To move towards the latest technology, you must start with the best smart fans, which can be controlled remotely or by mobile phones.
Take your time with your comfort and safety; commit to regular cleaning for a well-functioning and long-lasting window fan.
How to Clean a Window Fan Step-by-Step
1. Unplug the Fan
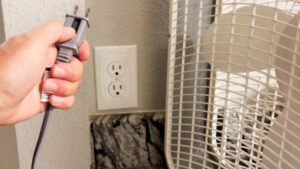 Before cleaning a fan, ensure the blades are still and flat, such as on a tabletop.
Never clean a fan while it is plugged in or shortly after disconnecting it since this might result in damage or an electrical mishap.
Unplug the fan’s power cable and remove it from the window after gathering the essential cleaning supplies.
To avoid potential risks, ensure the fan is disconnected from any electrical source. Remember to disconnect the fan before cleaning to safeguard yourself and the fan’s internal components.
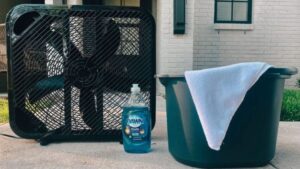
2. Attach a Dusting Brush to One End of the Vacuum Hose
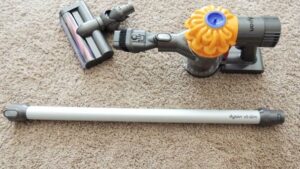 Attach a dusting brush to one end of the vacuum hose to effectively clean the fan’s grills and blades, just like we use it to clean the couch.
The latter is more straightforward to maneuver in compact areas than a canister, upright, or portable vacuum.
The round-shaped brush attachment is excellent for sweeping dust off surfaces and getting into nooks and crannies for a comprehensive and practical cleaning experience.
3. Clean the Grill
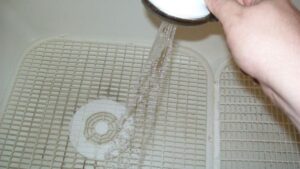 It is critical to clean the grill of your window fan regularly to ensure peak performance. Dust and dirt can build up, reducing their performance.
To begin, disconnect the fan and remove the blades for simple cleaning.
To remove loose debris from the grill, use a vacuum with a brush attachment, then wash it off with a moist cloth and a light detergent solution.
Pay close attention to highly filthy areas and gently scrub them if necessary. Before reassembling the fan, rinse any soap residue, blot dry with a cloth, and make sure the grill is fully dry.
4. Clean the Fan Blades
 Cleaning the fan blades is a simple step that improves the effectiveness of your fan and provides cleaner air circulation.
Begin by removing loose dust with a Hoover equipped with a brush attachment. Then, using a wet towel, wipe each blade with a light detergent or all-purpose cleanser.
Avoid bending the blades by being careful. Use a tiny brush or toothbrush to access hard-to-reach regions.
Finally, completely dry the blades before cleaning the fan grills for a cleaner, more efficient cooling experience.
5. Give It a Final Wipe Down
 To finish out your window fan, wipe it off thoroughly with a dry microfiber towel. Begin at the top and work through the grill, finishing at the bottom.
Remember to flip the fan over and clean the backside.
Dust, filth, and grime on the fan’s exterior can degrade its beauty and lifespan. Unplug the fan and use a moist towel to wash off the body, carefully paying particular attention to stains.
Cotton swabs or toothbrushes can be used to access hard-to-reach places. Before reassembling, rinse off any residue, pat dry, and make sure the fan is fully dry.
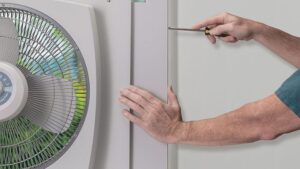
6. Reassemble the Window Fan
 After cleaning the window fan’s grill and fan blades, allow them to air dry on a towel or in the sun for 5-20 minutes.
Ensure they are completely dry before reassembling. Fit the front cover securely using screws or latches, and align the fan blades correctly.
Inspect for cleanliness and debris. Perform a final test to ensure smooth operation before plugging it back in.
Always follow the manufacturer’s guidelines for specific fan models during reassembly. Correctly reassembling and cleaning your window fan ensures efficient and smooth functioning.
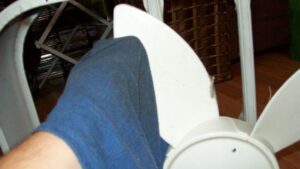
7. Test the Fan
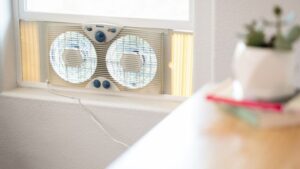 After reassembling your window fan, the final step is to plug it in and verify its operation.
Before connecting the power cable back to a wall outlet or resetting the circuit breaker, be sure it is accessible and untangled.
Observing unusual noises or sensations, turn on the fan’s control panel or power switch. The fan should spin smoothly and provide powerful, steady airflow.
If problems emerge, repeat the cleaning procedure and double-check the fan assembly to guarantee peak performance. Enjoy the revitalizing air circulation provided by your freshly cleaned fan.
Our Thoughts
Keeping your window fan clean is critical to its efficiency and durability. Cleaning regularly keeps dust and allergens from harming your indoor air quality and helps eliminate potential fire threats.
So, don’t be afraid to pamper your fan and enjoy a comfortable and healthy living area all year!