

Have you considered restoring your weathered wooden deck, shabby outdoor furniture, or worn-down siding? Well, meet your secret weapon: exterior wood filler!
Wood filler is more than just a handy tool; it’s your ticket to altering those outside places.
But what exactly is this beautiful ingredient, and how can you use it to restore the luster to your woodwork?
This Okayreview guide will explore exterior wood filler, how to use it effectively, and where it can come to your rescue.
So, if you’ve ever wondered how to give new life to your outdoor wooden structures, read on!
Table of Contents
Why Should You Use Exterior Wood Filler?
The use of external wood filler is critical for the maintenance and preservation of outdoor wooden buildings.
It mainly fixes and covers flaws like cracks and holes, improving the look of decks, siding, and fences.
Sealing these imperfections protects wood from moisture, vermin, and environmental damage that can lead to deterioration.
Furthermore, it produces a smooth surface that improves paint, stain, or sealant adherence, enhancing the appearance and longevity of the wood.
Exterior wood filler is a preventative step that ensures the endurance and cosmetic attractiveness of outside wood while protecting it from the weather.
Types of Exterior Wood Fillers
Exterior wood fillers come in various varieties, each tailored to specific purposes and climates.
Here are several examples:
1. Epoxy Wood Filler
 Epoxy fillers, noted for their durability and resistance to water, are good candidates for outdoor applications.
They excel at repairing large fractures, holes, or wood damage.
Once fully set, epoxy fillings establish strong connections with wood and may be sanded and painted.
2. Latex Wood Filler

Wood fillers based on latex or acrylic are versatile and user-friendly, making them excellent for small repairs such as nail holes, tiny fractures, and surface imperfections.
These fillers may be painted over once they’ve dried.
3. Oil-Based Wood Filler
 Oil-based wood fillers thrive in outside applications because of their remarkable durability and weather resistance.
These fillers refinish timber outdoor furniture, decks, and trim.
Notably, oil-based fillers may require longer drying than their latex-based counterparts.
4. Vinyl Wood Filler
 Vinyl wood fillers are great for small repairs since they are water-resistant and shrink-resistant.
They are readily painted or stained after cured, making them popular for exterior wood trim and molding applications.
5. Exterior Spackling Compound
 Spackling materials/compounds, which are lightweight, are designed to correct tiny surface flaws in wood.
They are excellent for smoothing uneven surfaces and filling minor gaps and fissures.
How to Use Exterior Wood Filler?
Using exterior wood filler effectively is essential for repairing and maintaining outdoor wooden surfaces.
Here’s a step-by-step guide to help you use exterior wood filler:
Step 1: Prepare the Surface
Thorough surface preparation is required before applying wood filler. Clean the damaged area with a scraper or putty knife, removing loose wood, dirt, and debris to restore a sturdy, clean, dry surface.
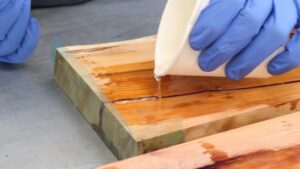
Step 2: Mix the Filler
Following the manufacturer’s mixing directions is critical when dealing with a two-part exterior wood filler. Create a smooth, uniform mix for simple, practical application.
Step 3: Apply the Filler
Apply the wood filler to the damaged area using a putty knife or scraper. Press it firmly into the hole, crack, or gap, ensuring it fills the space.
If you’re dealing with a more extensive repair, you may need to apply the filler in layers, allowing each layer to dry before adding more.
Step 4: Allow the Filler to Dry
Allow enough time for the wood filler to dry. It is critical to adhere to the manufacturer’s suggested drying time, which might vary depending on the product and ambient circumstances, as the label specifies.
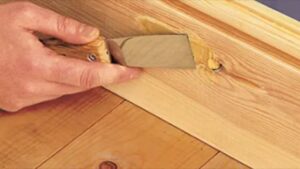
Step 5: Sand the Surface
Allow the filler to dry before using sandpaper with varying grit levels, beginning with a coarser grit and progressing to finer grits.
This procedure removes the restored piece, ensuring it blends in with the surrounding wood.
Step 6: Prime and Finish
Apply an appropriate primer before painting or staining the repaired area for a smooth finish.
After the primer has been set, paint or stain the surface to match the wood, following the product manufacturer’s instructions.
Tips for Using Exterior Wood Filler Effectively
- Always wear proper safety equipment, such as eye protection and gloves, when working with wood filler.
- As drying and curing durations vary, follow the manufacturer’s directions for the individual product you’re using.
- When applying wood filler, keep the weather in mind. To guarantee optimal drying, work on a dry, moderate day.
- Apply wood filler in stages for more extensive repairs, allowing each layer to dry before adding additional filler.
- Sanding is an essential step in creating a smooth, flawless surface. For the most excellent results, take your time with this process.
Sum Up!
For anybody wishing to revitalize their outside wooden buildings, exterior wood filler is a flexible and essential product.
Wood filler may help you achieve excellent results, whether fixing a damaged deck, restoring wooden siding, or adding a creative touch to your outdoor decor.
So, why wait? Grab your wood filler, roll up your sleeves, and let your outdoor renovation journey begin!