

Every homeowner knows that the details make the difference, especially in areas as crucial as the bathroom. One such detail, often overlooked until it’s too late, is the shower drain.
A properly installed shower drain ensures efficient water flow and prevents potential leaks and water damage.
Whether building a new bathroom from scratch or upgrading an existing one, understanding how to install a shower drain professionally can save you both time and money in the long run.
This OkayReview guide delves into the intricacies of setting up a shower drain, ensuring your next shower experience is refreshing and worry-free.
Table of Contents
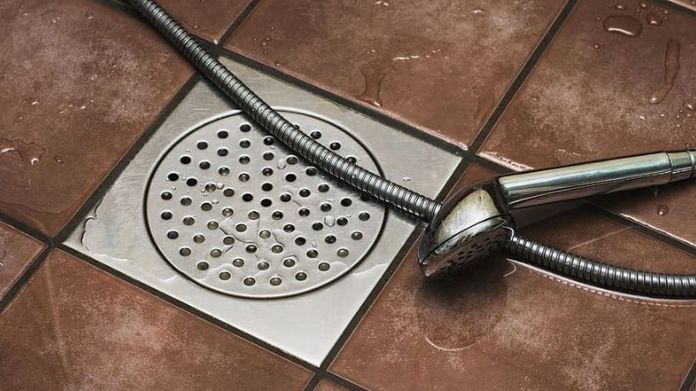
Understanding Different Types of Shower Drains
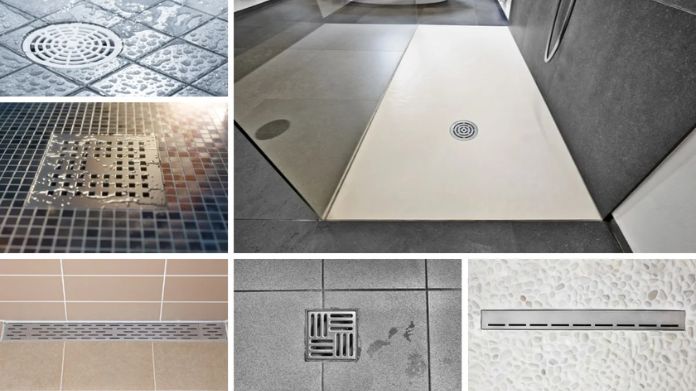 Various shower drains are available, each suitable for different scenarios. The choice of drain often depends on the flooring material and the specific installation requirements.
There are several types of shower drains available, each designed to cater to different needs and preferences:
1. Compression-Style Drains
These are the go-to choices for many homeowners due to their ease of installation. They attach to the home’s drain pipes using compression washers and nuts.
This type of shower drain is versatile and can be paired with various shower bases, including steel, fiberglass, and acrylic.
2. Solvent-Glued Drains
Made predominantly of PVC plastic, these drains are designed for a more permanent fit. They’re glued directly to the drainpipe, ensuring a watertight seal.
They’re especially recommended if you can access the area beneath the shower, such as an unfinished basement.
3. Tiled Drains
This three-piece drain system is ideal for those who prefer custom-tiled showers. Each part is installed at a different phase of the tile pan installation, ensuring the drain seamlessly integrates with the shower floor.
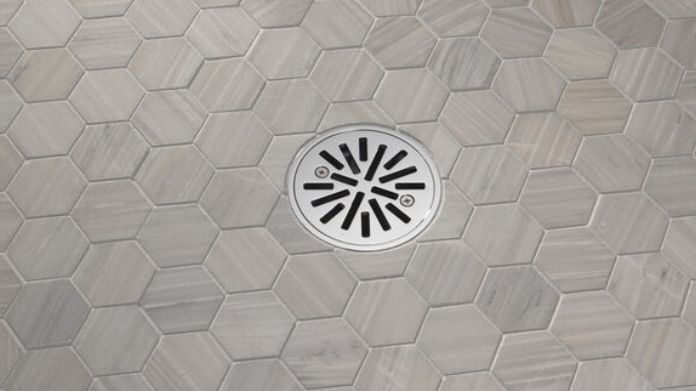
4. Linear Drains
A favorite in modern bathroom designs, linear drains offer a sleek and contemporary look. They run the length of the shower floor, providing efficient drainage and adding a touch of elegance to the bathroom.
Shower installation knowledge is essential, but pay attention to the lesser-known strategies for keeping your roof dry and healthy.
Materials Needed for Shower Drain Installation
 Installing a shower drain requires precision and suitable materials. Here’s a concise list of essentials for a smooth installation:
- Shower Drain Assembly: The main component is suitable for the type of drain you’re installing.
- Plumber’s Putty or Silicone Sealant: For creating a watertight seal between the drain and the shower base.
- PVC or ABS Pipe: Matches the shower drain’s specifications, typically 2 inches in diameter.
- Pipe Cutter or Hacksaw: For adjusting the drainpipe length.
- Adjustable Wrench or Pliers: To secure connections tightly.
- Solvent Cement: Used for bonding PVC drains to drainpipes.
- Teflon Tape: Seals threaded connections.
- Level: Ensures the shower drain is perfectly horizontal for efficient drainage.
How to Install a Shower Drain?
1. Installing a Compression-Style Shower Drain
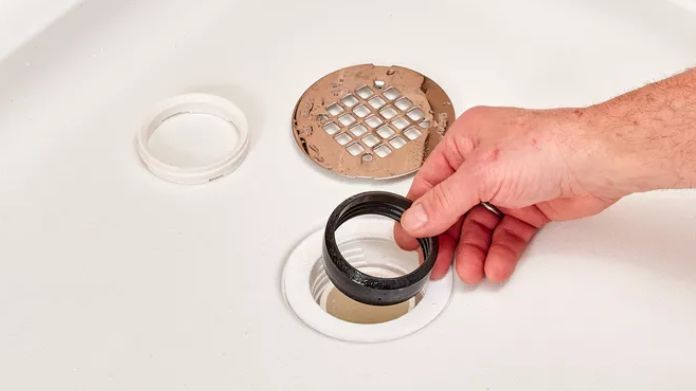 This type of drain is suitable for various shower bases, including steel, fiberglass, and acrylic.
Installing a compression-style shower drain is straightforward with the right tools and steps:
- Clean the workspace and gather your shower drain assembly, plumber’s putty, and wrench.
- Ensure it’s 3/4 to 1 inch below the shower base’s top.
- Apply a rope of putty around the drain flange’s underside.
- Insert the drain body into the shower base hole, ensuring the drainpipe extends.
- Press the drain flange into place, spreading the putty for a seal. Screw the flange into the drain body.
- Slide the gasket over the drainpipe, pressing against the shower base.
- Use a wrench to secure the shower drain from above, ensuring a watertight seal.
- Remove any excess putty.
2. Installing a Solvent-Glued Shower Drain
 Typically used for PVC plastic bases, this drain requires the drainpipe to be solvent-glued to the drain assembly. It ensures a durable, leak-free connection.
Here’s a quick guide:
- Have the shower drain assembly, solvent cement, and protective gloves ready.
- Cut it flush with the shower base.
- Ensure the shower drain aligns with the drainpipe.
- Coat the inside of the shower drain and the drainpipe’s exterior.
- Press the shower drain onto the drainpipe, holding it firmly.
- Allow the solvent to set for the manufacturer-recommended time.
- Run water to check for leaks.
3. Installing a Tile Shower Drain
 Installing a tile shower drain enhances your bathroom’s functionality and aesthetics. Here’s a simplified guide:
- Have ready the tile shower drain assembly, thin-set mortar, trowel, and waterproofing membrane.
- Ensure it slopes towards the drain hole.
- Secure it level with the shower base over the drain hole.
- Lay the membrane over the base, cutting out for the drain.
- Press it into the thin-set mortar, ensuring it’s flush.
- Cut tiles to fit around the shower drain, leaving space for the grate.
- Ensure it’s flush with the tiles.
- Apply sealant around the drain and check for leaks after drying.
4. Linear Shower Drain Installation
 Linear shower drains are modern and aesthetically pleasing. It offers a blend of modern aesthetics and efficient drainage.
Here’s a concise guide to installing one:
- Have ready the linear shower drain kit, leveling feet, waterproofing membrane, thin-set mortar, and trowel.
- Decide on the drain’s placement, ensuring the floor slopes towards it.
- Match the trench to the drain’s dimensions.
- Adjust its height using leveling feet, ensuring it’s flush with the floor.
- Overlap the waterproofing membrane over the drain edges.
- Embed the shower drain firmly in thin-set mortar.
- Cut tiles to fit snugly against the drain, leaving space for the grate.
- Slide it into the drain channel once the tiles are set.
- Ensure the water flows smoothly and there is no leak.
5. Installing a Preformed No-Caulk Shower Drain
 Designed explicitly for preformed shower bases, this drain offers seamless integration and is easy to install with suitable materials and tools.
Here’s a quick guide to installing it:
- Have the no-caulk shower drain assembly, screwdriver, and wrench ready.
- Ensure it’s clean with an adequately cut drain hole.
- Place it into the shower base’s drain hole from the top.
- Slide the gasket over the drain body from below, followed by the tightening nut. Tighten until a seal forms.
- Snap or screw it into the drain body to catch debris.
- Run water to check for leaks.
Key Tips for Installing a Shower Drain
A few expert tips can distinguish between a seamless process and potential pitfalls when installing a shower drain.
Here are some key pointers to ensure your shower drain installation goes smoothly:
- Measure Twice, Cut Once: Before making any cuts, double-check your measurements. Providing the right fit from the start can save time and prevent leaks.
- Choose the Right Drain Type: Different showers and preferences require different drain types. Whether linear, tiled, or compression-style, pick the one that suits your bathroom’s design and functionality.
- Ensure Proper Slope: The shower floor should slope towards the drain to facilitate efficient water flow. A 1/4 inch per foot slope is suggested.
- Waterproofing is Crucial: Always ensure the area around the shower drain is adequately waterproofed. This step prevents potential water damage and mold growth.
- Test Before Finalizing: Run water through the drain before sealing everything up to check for leaks. Addressing issues at this stage can save future headaches.
- Keep Weep Holes Clear: If your shower drain has weep holes, ensure they’re not blocked. These holes allow water trapped under the tiles to drain away.
- Follow Manufacturer’s Instructions: While general tips are helpful, always refer to the manufacturer’s guidelines for specific installation steps and recommendations.
- Safety First: Always wear safeguards such as gloves and safety glasses when working with tools and adhesives.
Conclusion:
Installing a shower drain might seem daunting, but you can achieve a professional finish with the proper knowledge and tools.
Whether renovating your bathroom or addressing a leak, understanding the installation process ensures a functional and aesthetically pleasing result.
Excellent guide on choosing the right shower drain! I appreciate how you covered everything from types of drains to installation tips and maintenance. The detailed explanations and practical advice make finding the perfect fit for any bathroom easy.